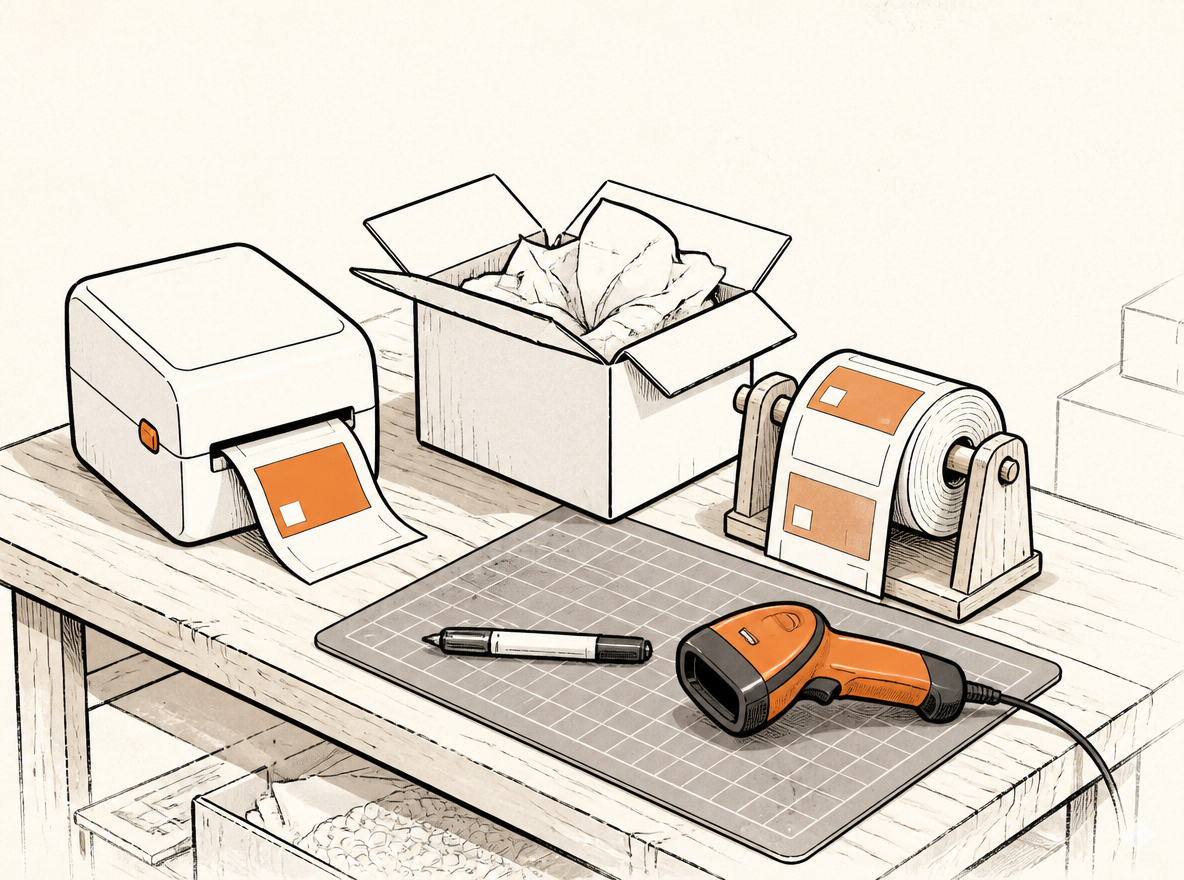
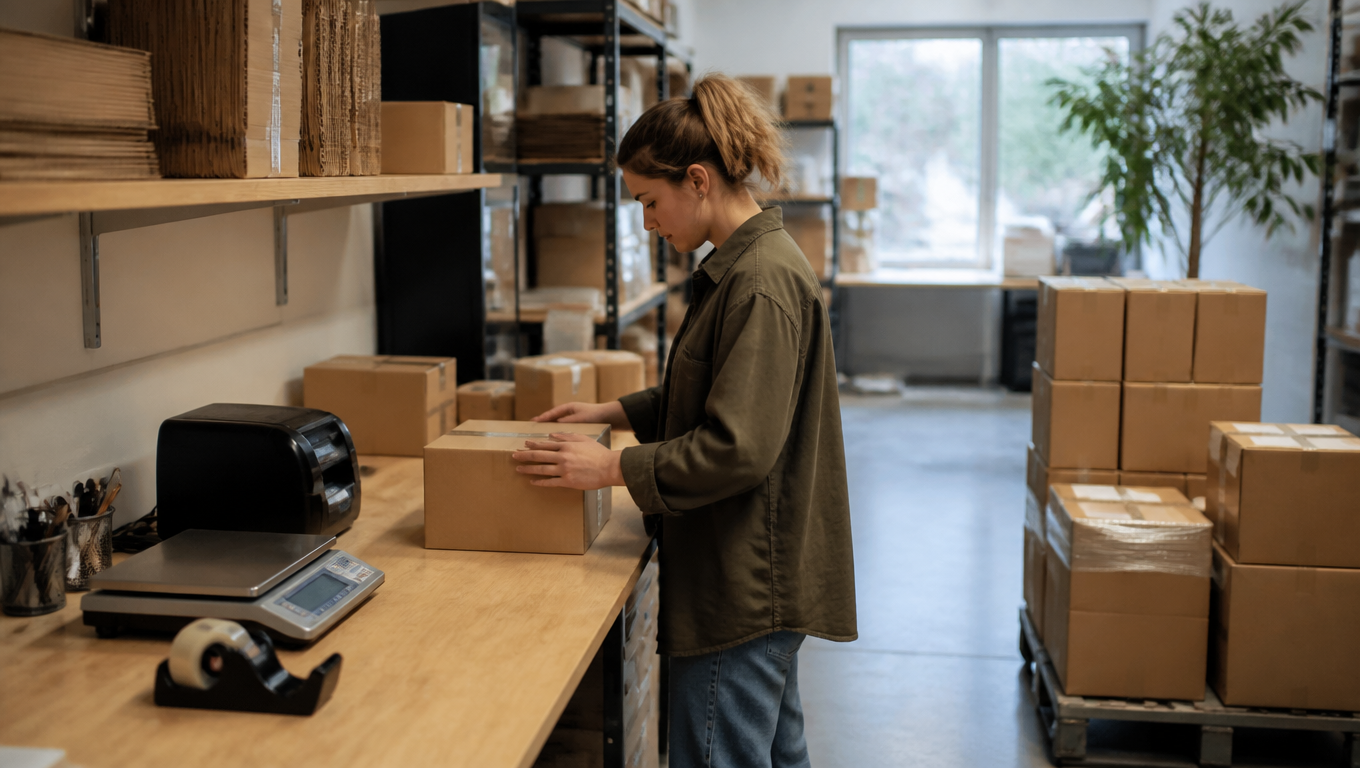
A label is not a document. It is an object a scanner and a sorter have to read. Illustration.
The right printer for a small business is decided by orders per day, not by the spec sheet: under about 20 orders a day what you already own will do, and above that the decision moves to a 4 by 6 direct thermal unit at the packing bench.
The short answer, by volume. Under about 20 orders a day the printer already in the house is usually enough: USPS accepts output from laser printers and high quality inkjet printers, and plain white paper is allowed[1]. Between about 20 and 80 orders a day, one 4 by 6 inch direct thermal printer at the packing bench pays for itself in label stock, tape and handling time. Beyond that, or the moment two people pack at the same time, you are not buying one faster printer, you are buying a network printer per station.
The five sections below run in the order most sellers hit them, from whether the printer they own can still do the job to whether the box that just arrived is any good. The last two give a cost model you can re-run and an acceptance test you can execute on the day the machine lands. If you are building or scaling a whole shipping operation, the hardware is one part of it; for the wider frame see ecommerce shipping solutions.
Three short answers
Can you keep the printer you own: yes. Laser and high quality inkjet both work, plain white paper is allowed, and the decisive setting is 100% scale rather than fit to page[1].
What to buy: above roughly 20 orders a day, a 4 by 6 direct thermal unit, with no ink and no ribbon, printing one label per job.
What a label costs: count device, stock, consumables, handling time and reprints, and at 50 labels a month the three paths come to $0.45, $0.35 and $0.20. The inputs are all written down in section four.
1. Can the printer you already own print shipping labels?
Yes, at low volume, with two things to watch: print scale and barcode quality.
USPS is explicit about what it accepts for Click-N-Ship labels: a laser printer or a high quality inkjet works, 600 dpi is recommended for inkjet, self-adhesive label sheets are recommended but plain white paper is acceptable. Two warnings in the same guidance matter more than the hardware list: tape makes it difficult for processing equipment to read the label, and a label printed too small may not be readable, so labels should be printed at approximately 4 by 6 inches[1].
A blunter sentence sits in the other piece of guidance: labels produced by low quality inkjet or dot matrix printers cannot be reliably read by its scanning equipment[2]. That sentence is most of the argument for buying anything at all.
A label is not a document. It is a machine-readable object that has to survive a scanner, a conveyor and a driver's handheld. That is where the three realistic workflows differ.
Workflow
Steps per order
Typical handling time
What goes wrong
Plain paper plus tape
Print, cut with scissors, tape two or three strips, attach
Slowest, roughly 40 seconds
Tape across the barcode, wrinkles, peeling in rain, paper soaked on a damp doorstep
Adhesive 2-up sheet
Print a letter-size sheet, peel, stick
Moderate, roughly 20 seconds
You print two labels for one order, so the second is wasted
4x6 direct thermal
Print, peel, stick
Fastest, roughly 12 seconds
Almost nothing, once the roll is loaded and the printer is calibrated
The timings are the assumptions used in the cost model later, not a lab measurement. Time your own bench once; that number is the one that matters.
The 2-up sheet exists because USPS formats the domestic label as two 4 by 6½ inch labels on one 8½ by 11 inch sheet of self-adhesive paper[2]. If you already own a laser printer and ship fewer than a dozen orders a week, buying a pack of those sheets is a legitimate answer rather than a compromise: it removes the scissors and the tape, which are the two steps that actually damage labels.
One more reason to keep a sheet printer around: a thermal printer prints labels and nothing else. Packing slips, commercial invoices, return paperwork and the occasional document still need the laser or the inkjet.
2. Match the device to your packing setup
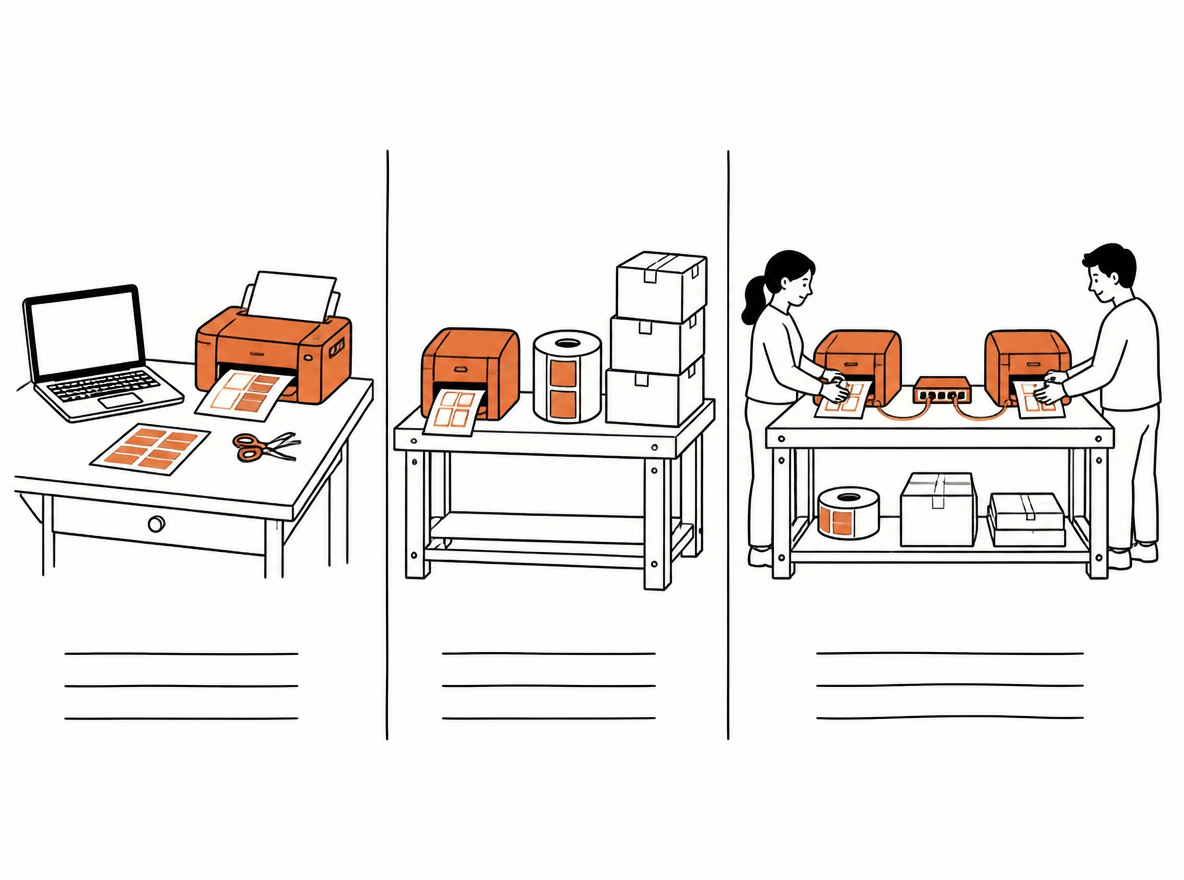
Three setups cover almost every small seller, and the difference is not the price tag but connection, continuous printing and consumable capacity. Pick the row that describes your last busy week, not your best week.
Setup
Orders per day
Connection
Printing pattern
Consumables to keep on hand
Home workbench
Under 20
USB to the household computer
One label at a time
A 100-sheet pack of 2-up adhesive labels, or plain paper plus clear tape
Solo packing station
20 to 80
USB to the packing laptop or desktop
Batches of 10 to 50 labels queued from the shipping platform
A 250-label roll of 4x6 direct thermal stock, plus one spare roll
Multi-station micro-warehouse
80 and up, two or more packers
Ethernet to a switch, one queue per station
Continuous batches, printed at each station as orders are packed
450-label rolls or an external roll holder, plus a shared stock shelf
What forces a new device is the number of stations and packers, not print speed. Illustration.
Home workbench. Keep the all-in-one, or buy a cheap monochrome laser. What matters at this volume is not speed but the absence of smearing: inkjet ink on cheap paper smudges under a thumb, and a smudged barcode is an exception at the counter. Set the print dialog to 100% scale and leave it there[1]. In sequence, buy adhesive sheets before you consider new hardware.
Solo packing station. This is where a 4x6 direct thermal printer earns its place. It needs no ink, prints one label per job, and turns the label step into peel and stick. USB is enough, and it is the connection with the fewest ways to fail. A 203 dpi desktop unit is fine for standard carrier labels; if you also print small return barcodes, or dense international paperwork on 4x6 stock, 300 dpi removes the scanner-has-to-try-twice conversation.
Multi-station micro-warehouse. Two packers fighting over one USB printer is the real bottleneck, not print speed. Buy one printer per station and put each on Ethernet rather than Wi-Fi. Wireless drops out exactly when a queue is waiting, and a dropped job means a reprinted label and a re-opened order. Give each printer its own queue name so packers can see which device they are sending to. A higher duty cycle and a bigger roll start to matter here, mostly because swapping a 250-label roll in the middle of a three hundred order day is an avoidable interruption.
A note on continuous printing, since the term gets used for two different things. A 4x6 thermal printer always prints one label per job; batching forty labels is a software function, not a printer feature. A sheet printer forces you to think in sheets, two labels at a time, which is why it stops scaling before the hardware does. For queueing and latency on the software side, see the pack-station label latency diagnostic.
3. What to check before you buy
Start with the device class, then run the checklist against the product page; if the product page is vague, open the manual. Most bad purchases fail on items three, four and six.
Device class
Typical spec
Connection
Consumables and rolls
Fits
Indicative price
Monochrome laser or inkjet all-in-one (already owned)
Letter width, prints by page
USB or Wi-Fi
2-up adhesive sheets, or plain paper plus tape
Under 20 orders a day, and packing slips still matter
Owned, $0
Entry desktop direct thermal
203 dpi, 4x6 width
USB
1 inch core, 100 to 250 label rolls
A single station at 20 to 80 orders a day
About $100 to $200
Desktop direct thermal, 300 dpi
300 dpi, 4x6 width
USB and Ethernet
1 or 3 inch core, 250 to 450 label rolls
Small barcodes, return labels, international paperwork
About $200 to $350
High-duty or industrial unit
203 or 300 dpi, metal frame
Ethernet, often serial as well
3 inch core, 450 labels and up
Multiple stations printing across shifts
$400 and up
Thermal transfer, with a ribbon
203 or 300 dpi
USB or Ethernet
A ribbon plus stock, resistant to heat and abrasion
Long-life inventory and compliance labels, not shipping labels
$250 and up, plus ribbon cost
Label format. 4 by 6 inch die-cut labels with a gap between them are the de facto standard that shipping platforms output and desktop thermal printers expect. Confirm the printer is set up for die-cut stock with a gap sensor, not just continuous roll.
Print technology. Direct thermal uses heat-sensitive paper and no ribbon, which is what you want for shipping labels[3]. Thermal transfer uses a ribbon and lasts longer under heat and abrasion, but it adds a consumable and a loading step for a box that ships in two days.
Driver support. Check Windows and, if you use one, macOS and Linux. Recent Apple Silicon Macs need a current driver or a CUPS-compatible one; some inexpensive models are Windows-only and say so only in the manual.
Connection. USB is the default. Ethernet if the printer is shared. Wi-Fi only if there is no cable run, and check whether the model is 2.4 GHz only, because a 5 GHz network will not see it.
PDF and ZPL. Most sellers print a PDF that the shipping platform generates. If your ERP, WMS or in-house tooling emits raw ZPL or EPL, buy a printer that natively speaks it instead of adding a converter to the chain.
Consumables lock-in. Some inexpensive printers are cheap because the labels are not. Price a case of 1,000 compatible 4x6 labels before you buy the device, and check whether the printer uses a chip or a proprietary roll size. A $30 per 1,000 label cost difference is bigger than most device price differences.
Media limits. Maximum media width, core diameter (1 inch versus 3 inch), and maximum roll outside diameter. A printer that only accepts 1 inch cores will not take the 3 inch core case you were planning to buy.
Resolution. 203 dpi handles standard 4x6 carrier labels; 300 dpi helps when barcodes are small or the label carries dense return and customs information.
What is in the box. A starter roll and a USB cable are worth checking, because printer only is common and the first print is then a week away.
Return window and warranty. A 30 day return window is the cheapest insurance in this purchase. Run the acceptance test in section five inside it.
4. What a label actually costs
The sticker price of the printer is the smallest number in this decision. The number to compare is cost per label:
cost per label = (device cost ÷ labels printed over its life) + label stock + ink, toner or ribbon + handling time + reprint waste
What follows is a hypothetical example with every assumption written down. Replace the inputs with your own bench; the structure holds even when the numbers move.
Input
Value used
Where it comes from
Volume
50 labels per month
About two a day, a busy side business
Device life
36 months
A conservative replacement cycle for a $180 desktop thermal printer
Device cost
$180
Mid-range desktop 4x6 direct thermal
4x6 thermal labels
$0.03 each
Typical mid-range direct thermal stock
2-up adhesive sheets
$0.45 per sheet, so $0.225 per label
Letter-size 2-up sheets
Laser toner
$0.03 per sheet, so $0.015 per label
Toner cost per printed page on a mono laser
Your time
$18 per hour
Internal labour rate, not a market wage claim
Handling time
40 s paper and tape, 20 s 2-up sheet, 12 s thermal
Bench estimate
Reprint rate
3% on paper, 1% on thermal
Damaged or unscannable labels
The result at 50 labels per month:
Path
Stock per label
Device per label
Time per label
Reprint allowance
Total
Laser plus plain paper and tape
$0.240
$0.000
$0.200
$0.013
$0.45
Laser plus 2-up adhesive sheets
$0.240
$0.000
$0.100
$0.010
$0.35
4x6 direct thermal
$0.030
$0.100
$0.060
$0.004
$0.20
Over a year that is about $270 for paper and tape, $210 for 2-up sheets, and $120 for the thermal printer. The thermal path also returns roughly 4.7 hours of packing time a year at this volume, counting the 28 second difference per label.
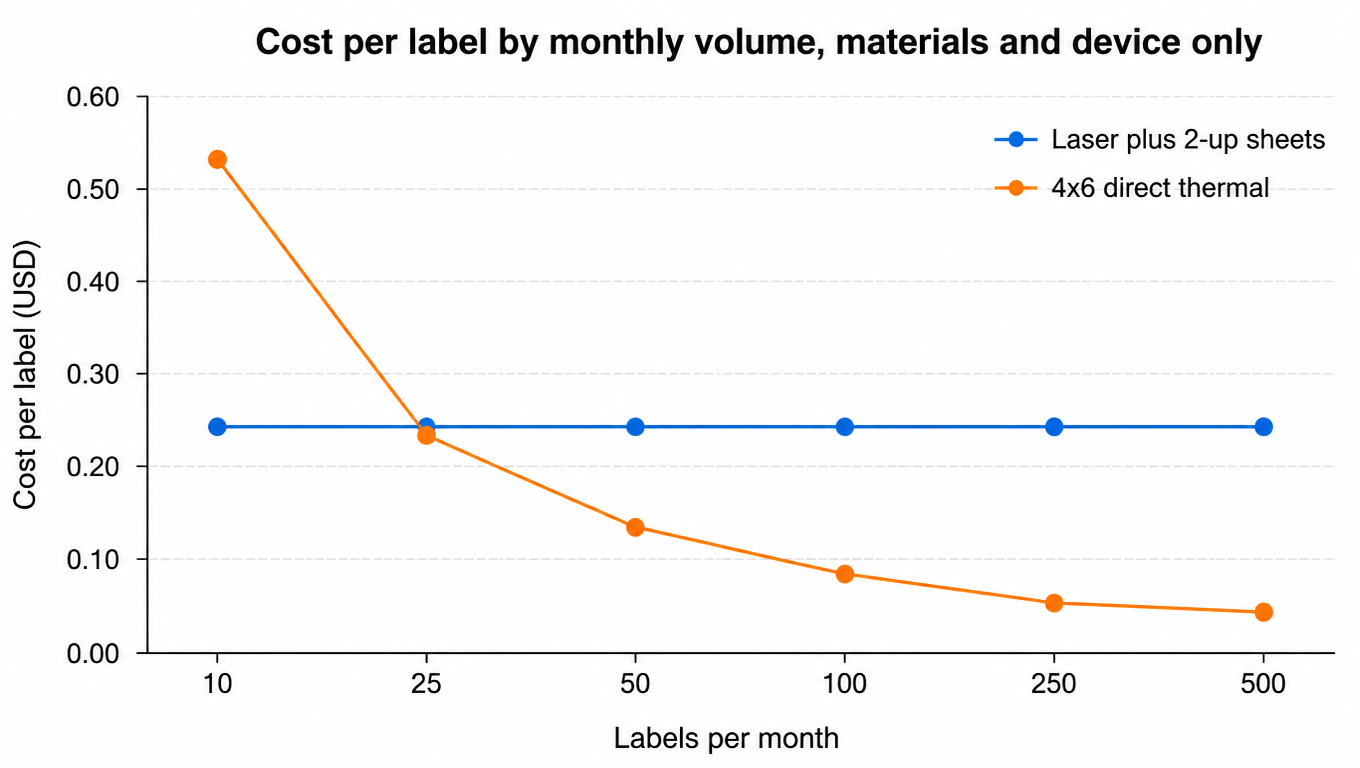
Where the answer flips. Plenty of sellers do not bill their own evening hours, and that changes the maths in a useful way. Strip labour out and the comparison becomes label stock plus device only: $0.24 per label on sheets versus $0.03 per label plus $5 of device per month on thermal. Those are equal at about 24 labels a month.
Materials and device only: the lines cross at roughly 24 labels a month. Illustrative model, not a quote.
So the defensible rule is: below roughly two dozen labels a month, the sheet printer you already own is the rational choice and a thermal printer is a convenience purchase. Above it, the thermal printer is cheaper before you value your time at all, and the gap widens with every order. If you have no printer at all, remember that a mono laser also prints packing slips and documents, and a thermal printer does not.
Two costs this model leaves out on purpose, because they are hard to price and easy to feel: the hour spent fighting a jammed sheet printer during your busiest week, and the cost of a label that scanned at the origin but not at the destination. The second one is usually a claim, a reship or a polite email you did not have time to write. For whether label stock is genuinely cheaper from one source than another, see how to verify a discount label source; for whether a wasted label is refundable, see unused and voided labels.
5. Test the printer when it arrives
Do this inside the return window, with real labels, not a vendor test page.
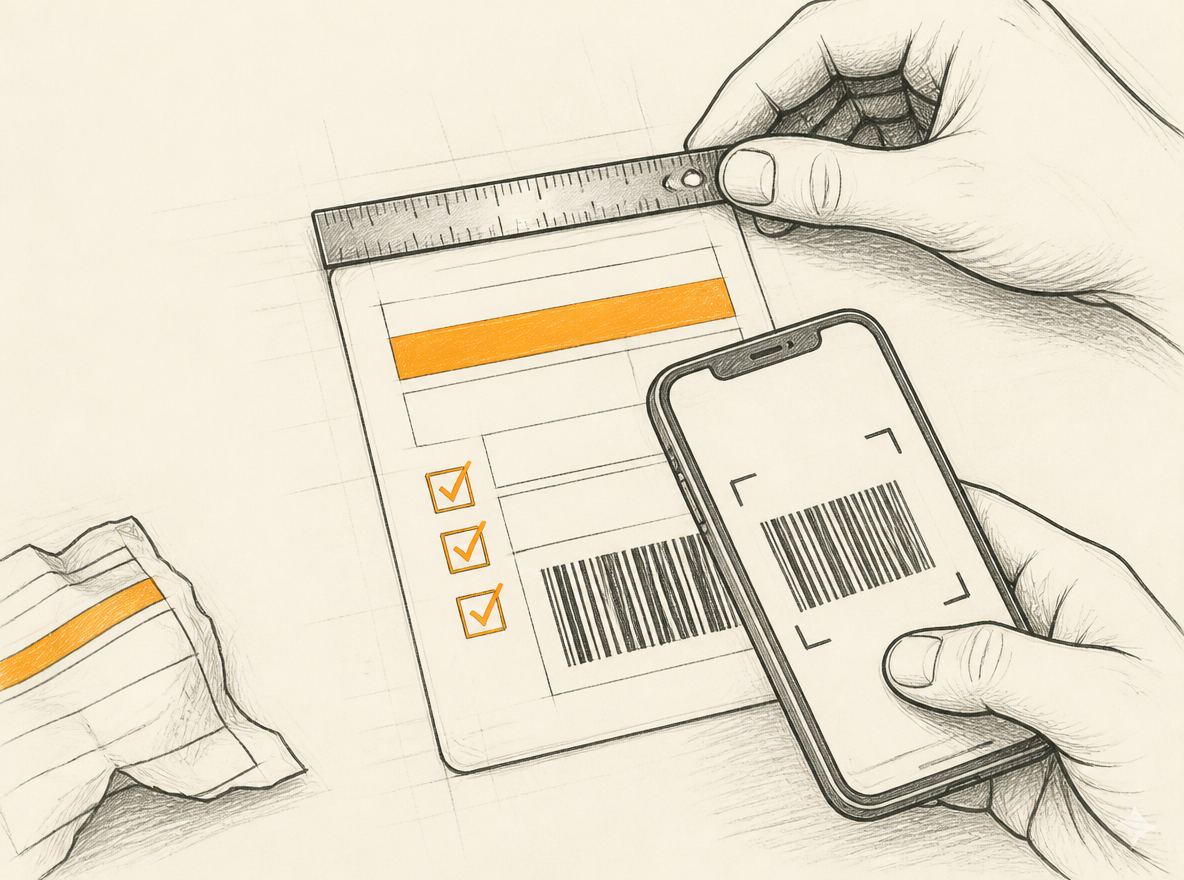
Measure it, scan it three times, print a batch and check both ends. Illustration.
Load and calibrate. Full roll, correct media width, then run the printer's gap calibration. Every misaligned first batch we have seen started here.
Print real carrier labels. Generate an actual USPS Ground Advantage label, an actual UPS label and an actual FedEx label from your shipping platform. Vendor test pages use clean vectors and flatter the printer.
Check the scale setting. The print dialog must say 100%, not fit to page or shrink oversized pages. USPS asks for labels printed at approximately 4 by 6 inches, and scaling is the most common way a label quietly becomes unscannable[1].
Measure, do not eyeball. A ruler against the label edge, both dimensions. Then check that the barcode is complete, not clipped at an edge, with its white margin intact.
Scan it three times. Handheld scanner if you have one, otherwise a phone scanning app. If it takes more than one attempt, raise print density or slow the print speed before you touch anything else.
Run a batch. Queue 10 labels and inspect the first and the last. Drift and skew show up at the end of a batch, not the beginning.
Test your actual stock. The roll that came in the box is not the roll you will reorder. Cheap direct thermal stock has weaker adhesive and a thinner liner, and it is the usual cause of a label curling off a poly mailer.
Attach one and look at it. Largest flat surface, no tape over the barcode, no pouch or sleeve covering it. USPS is direct about tape interfering with its processing equipment[1].
Print the awkward formats. A return label, an international label if you ship abroad, and a packing slip. Anything that fails here fails in front of a customer.
Troubleshooting
Symptom
Likely cause
Fix
Labels print blank or half blank
Wrong media type, direct thermal versus thermal transfer, or stock loaded upside down
Check the media setting, then flip the roll
Barcode scans only on the second attempt
Print density too light, speed too fast, or 203 dpi on a dense small barcode
Raise density, lower speed, or move that label format to a 300 dpi printer
Print drifts off the label after a few pages
Calibration, or the gap sensor is picking up a dark liner
Re-run gap calibration, clean the sensor
Barcode clipped at the edge
Fit to page scaling, or wrong page size such as letter instead of 4x6
Set 100% scale and the exact page size
Printer goes offline mid-batch
Wi-Fi dropout, or the computer slept
Move to USB or Ethernet, disable sleep on the packing computer
No printer listed after plugging in
Driver not installed, or a macOS version without support
Install the vendor driver, verify the queue name
Labels curl off poly mailers
Weak adhesive on cheap stock
Change label brand before blaming the printer
Raw commands print as text
ZPL sent to a printer that expects PDF, or the reverse
Confirm the output format in the shipping platform
The printer is only half of the label
A printer decides how cleanly a label comes out. What goes on the label, which service, at what rate, for which order, is decided upstream. Sellers who print fifty labels a day are rarely slowed down by the printer; they are slowed down by creating those labels one at a time, or by guessing at the carrier instead of comparing options.
That is the layer EasyShippingX works in: a channel-neutral shipping layer that compares US carrier options together and lets a seller execute through the Portal, from a spreadsheet, or through an API. Pick the printer for your bench; if label creation is already your bottleneck, the printer is the easy half of the problem. Packed weight and outer carton dimensions move the quote directly, so start with the shipping rate calculator and confirm the billing basis with the package size checker.
Yes. USPS accepts laser printers and high quality inkjet printers, recommends 600 dpi for inkjet, and allows plain white paper though self-adhesive sheets are recommended. Keep the print scale at 100% and run the acceptance test in section five before you print your first hundred labels.
No. Direct thermal printers create the image with heat on treated paper, so there is no ink, toner or ribbon to buy. Your only consumable is the label roll, which is why the per-label cost drops so sharply in the model above.
USPS asks for online labels printed at approximately 4 by 6 inches and warns that smaller labels may not be readable by its scanning equipment. On a sheet printer, USPS formats the label as two 4 by 6½ inch labels on a letter-size sheet. 4 by 6 is also the stock size every desktop thermal printer is built around.
203 dpi is enough for standard carrier labels at 4 by 6. Choose 300 dpi when the label carries small barcodes, dense customs or return information, or when you print on narrower stock. Resolution is not the only variable: density and print speed matter just as much to whether a scanner reads it.
Usually, but verify the driver before you buy. Most current desktop thermal printers offer a macOS driver or work through CUPS; a number of inexpensive models are Windows-only. This is the single most common compatibility surprise.
USB for a single station, Ethernet when the printer is shared, Wi-Fi only when there is no cable run. Wireless failures cost more than the cable, because they happen during a queue.
The cost model in section four is this article's own illustrative example: device price, label stock price, reprint rate and handling time are inputs listed in the assumptions table, not a vendor quote or an industry average. Replace them with your own bench numbers and the conclusion may change, as the text says.